2 PCS Rocker Switch DPST On Off Toggle 15 A 250 V 20 A 125V 4 PIN EC-2604 Ebay
Miscellaneous: 18 gauge wire (Red-Black), blade connectors (Straight-Piggyback), hex stand-off 2-56 x 1/4″ and machine screws with nuts.
Construction
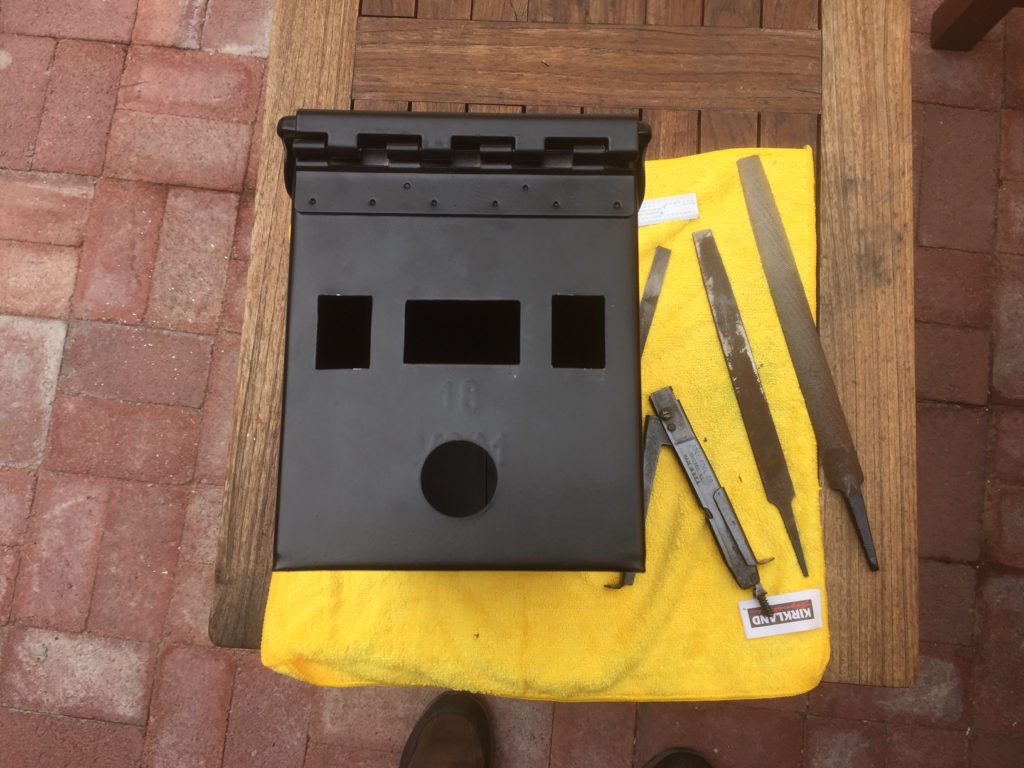
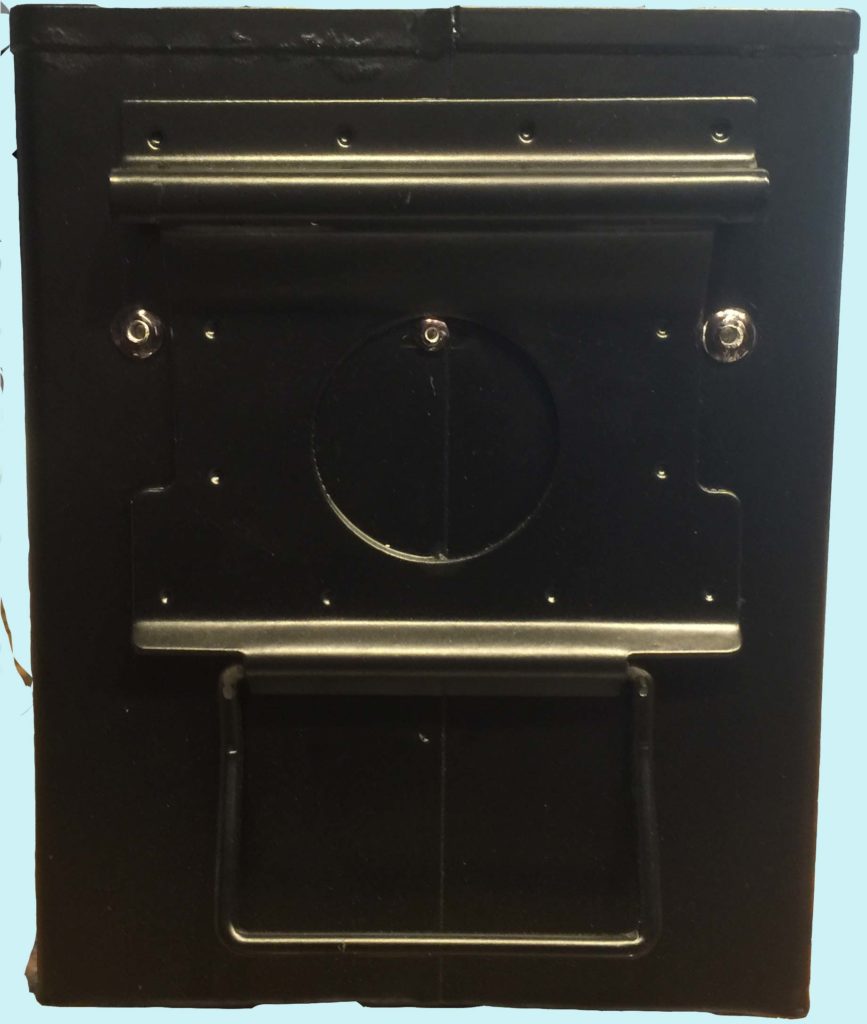
Step 1 - Cut Holes in Front Panel
Using the template for the front panel and a pencil, mark where the holes need to be cut on the front of the ammo box. Drill a 1/2″ hole in the center of each hole. Using the nibbling tool remove the unneeded sheet metal to square up each of the holes. Warning: Check components for proper fit as you go, so you don’t remove too much sheet metal. Next, using the Ruko 30 mm diameter punch make the hole for the Power Pole receptacle. Finally, file each of the holes to the proper size for the component to be installed.
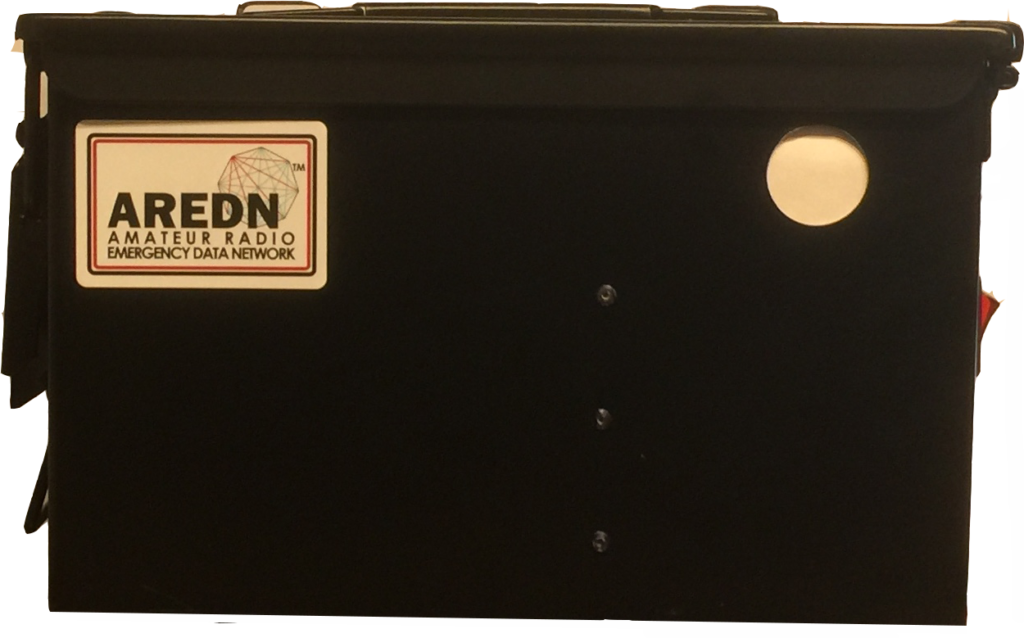
Step 2 - Cut Holes in Box Sides for Cable Entrance and Charger Socket
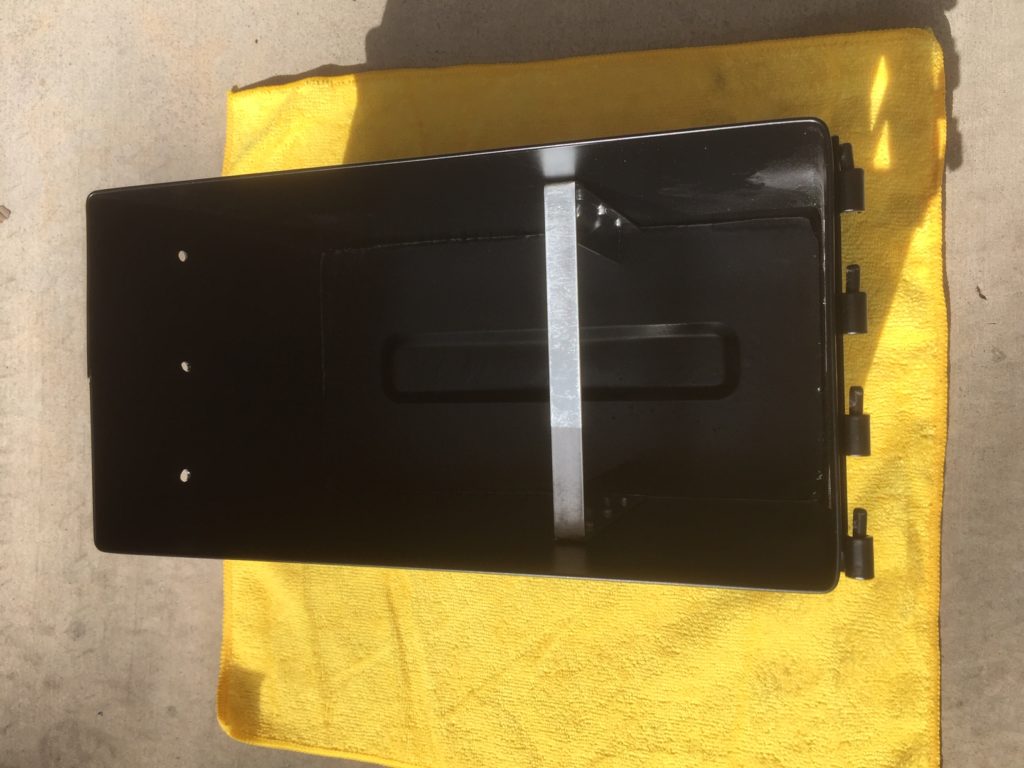
On the left side of the power box as you face the front panel, drill a 1/2″ pilot hole and punch a 30 mm hole 2″ from the front panel and 1 5/8″ down from the top of the box with the lid removed. See photo.
On the right side of the power box as you face the front panel, drill a 7/16″ hole 2″ from the front panel and 1″ from the bottom of the box. See photo.
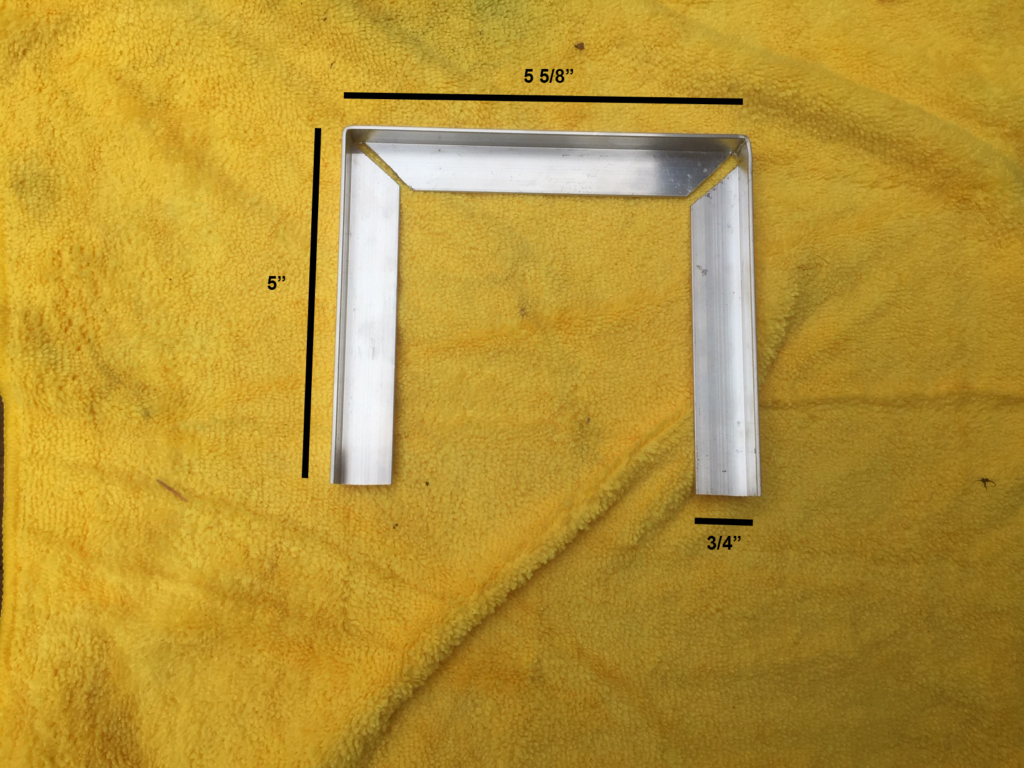
Step 3 - Bend 3/4" x 1/2" Aluminum Flat Angle and Rivet in Place
Bend the 3/4″ x 1/2″ aluminum flat angle in the shape and with the dimensions shown in the photo.
The battery lid support can now be riveted into place using six 1/8″ pop rivets. The line of rivets can be seen in a photo from Step 2. The line of rivets are 4 5/8″ from the front panel and are spaced from the bottom by 1″ – 2 1/2″ – 4″.
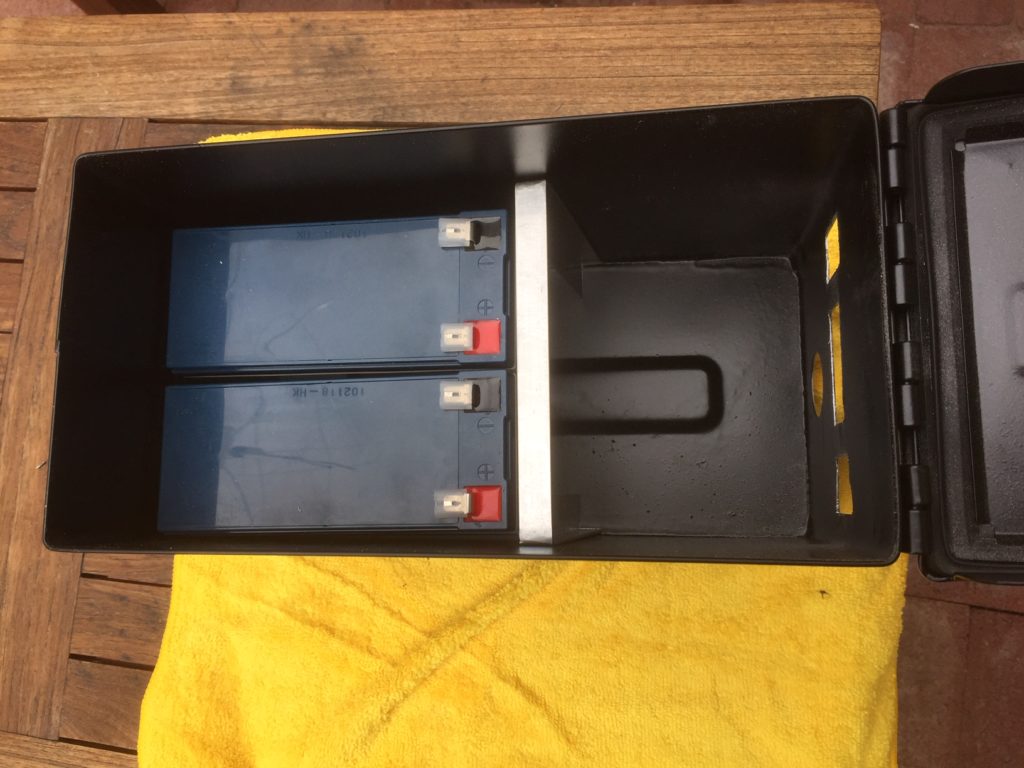
Step 4 - Construct and Install Battery Cover
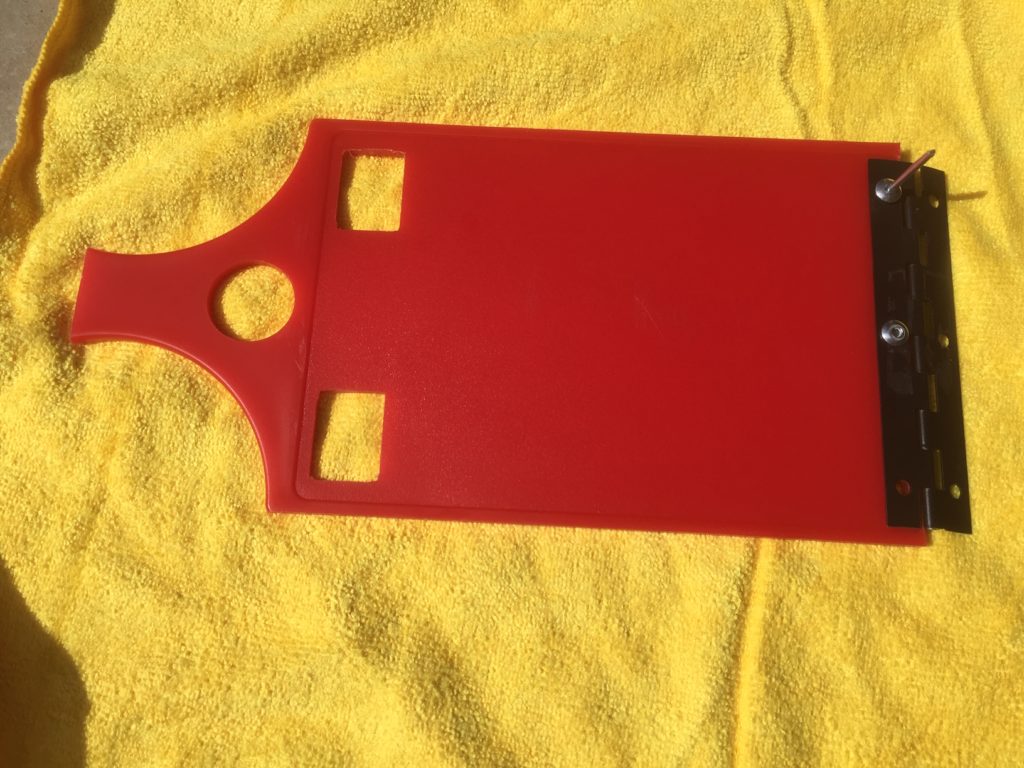
Fashion the battery cover by first reducing the width of the cutting board, so it will fit in the box. This may be done using a router, block plane or file. Make sure there is at least 1/8″ of space on either side of the cutting board. This space may be necessary, because installation of the board is never quite square and it prevents the board from coming in contact with the sides of the ammo box. The wide end of the cutting board will need to have the 3/16″ raised section trimmed off using a router, block plane or file. This insures a proper fit for the hinge. Mark and cut the board to fit length wise in the box by cutting off the end of the cutting board handle. See photo.
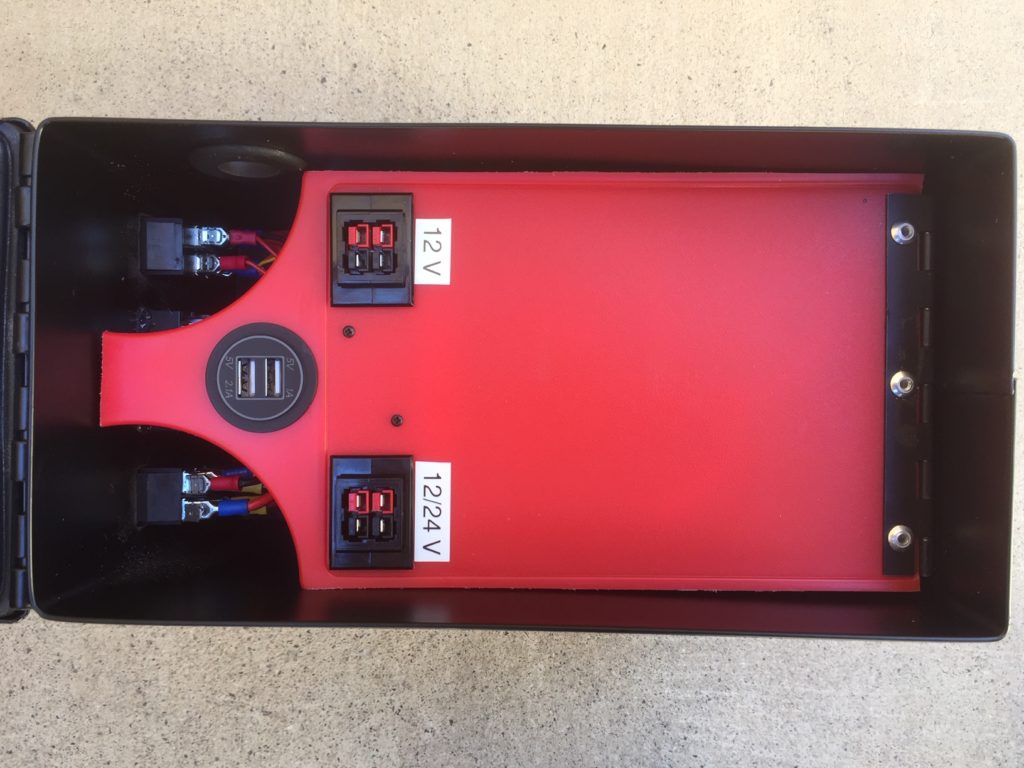
Next, using the template downloaded in Step 1, mark and cut the rectangular holes for the Power Pole sockets. Also, in the area shown between the two rectangular holes drill a 1/2″ pilot hole for the 1 1/8″ step drill. This hole will be used for the dual USB socket.
Next, cut a section of hinge as shown in the photo, mark and drill the holes, and rivet it to the cutting board with 3/16″ pop rivets and flat washers on the back side. This prevents the rivets from pulling through the plastic.
Next, mark and drill the holes in the box to match the hinge. See photo. Finally, place the board in the box, align the hinge holes and rivet in place with 3/16″ pop rivets.
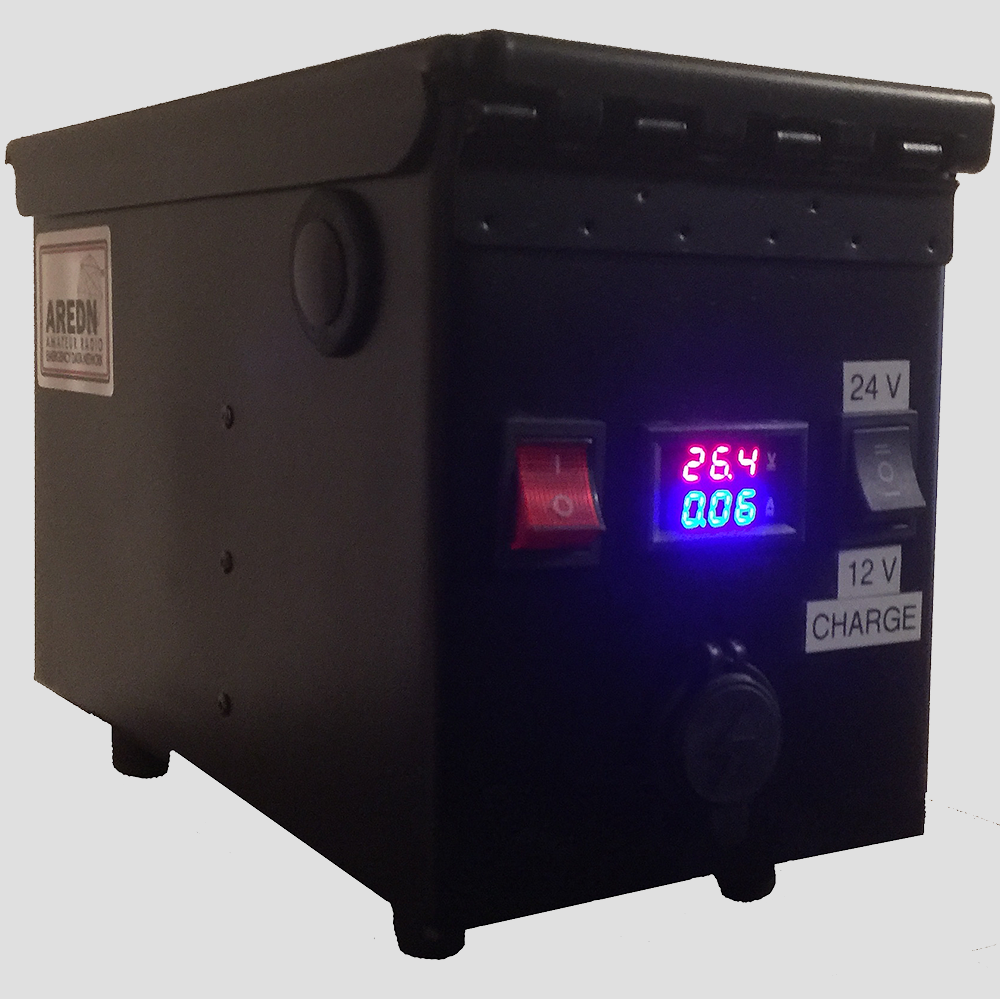
Step 5 - Install Components
Take another cutting board and cut (hacksaw, Dremel, router or file) it to fit in the bottom of the ammo box as shown in the photo. Doing this helps keep the batteries level and in place. Next, install the batteries and other components in preparation for wiring.
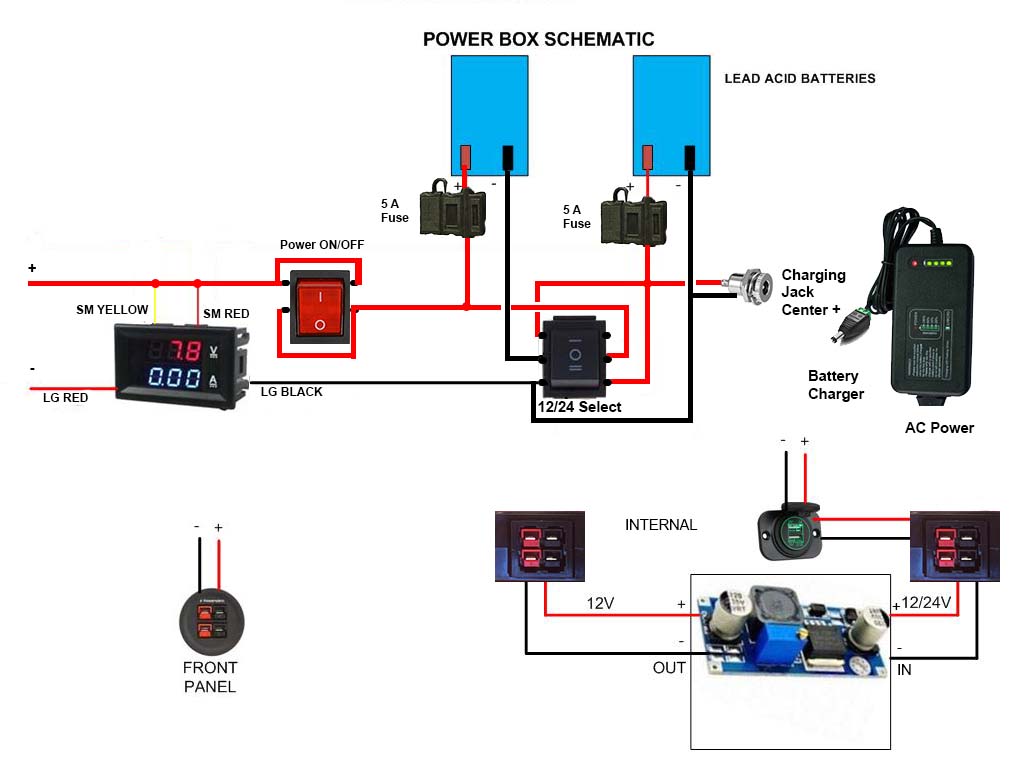
Setp 6 - Wiring
Using the wiring diagram provided, wire the box using 18 gauge wire and blade connectors.